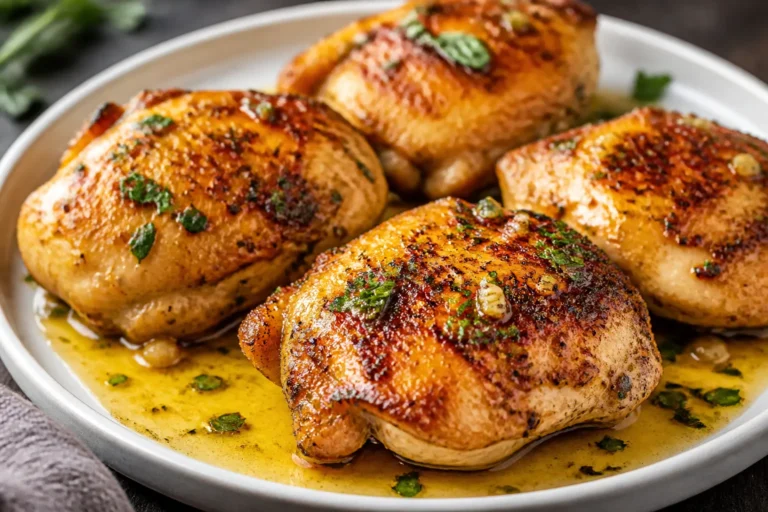
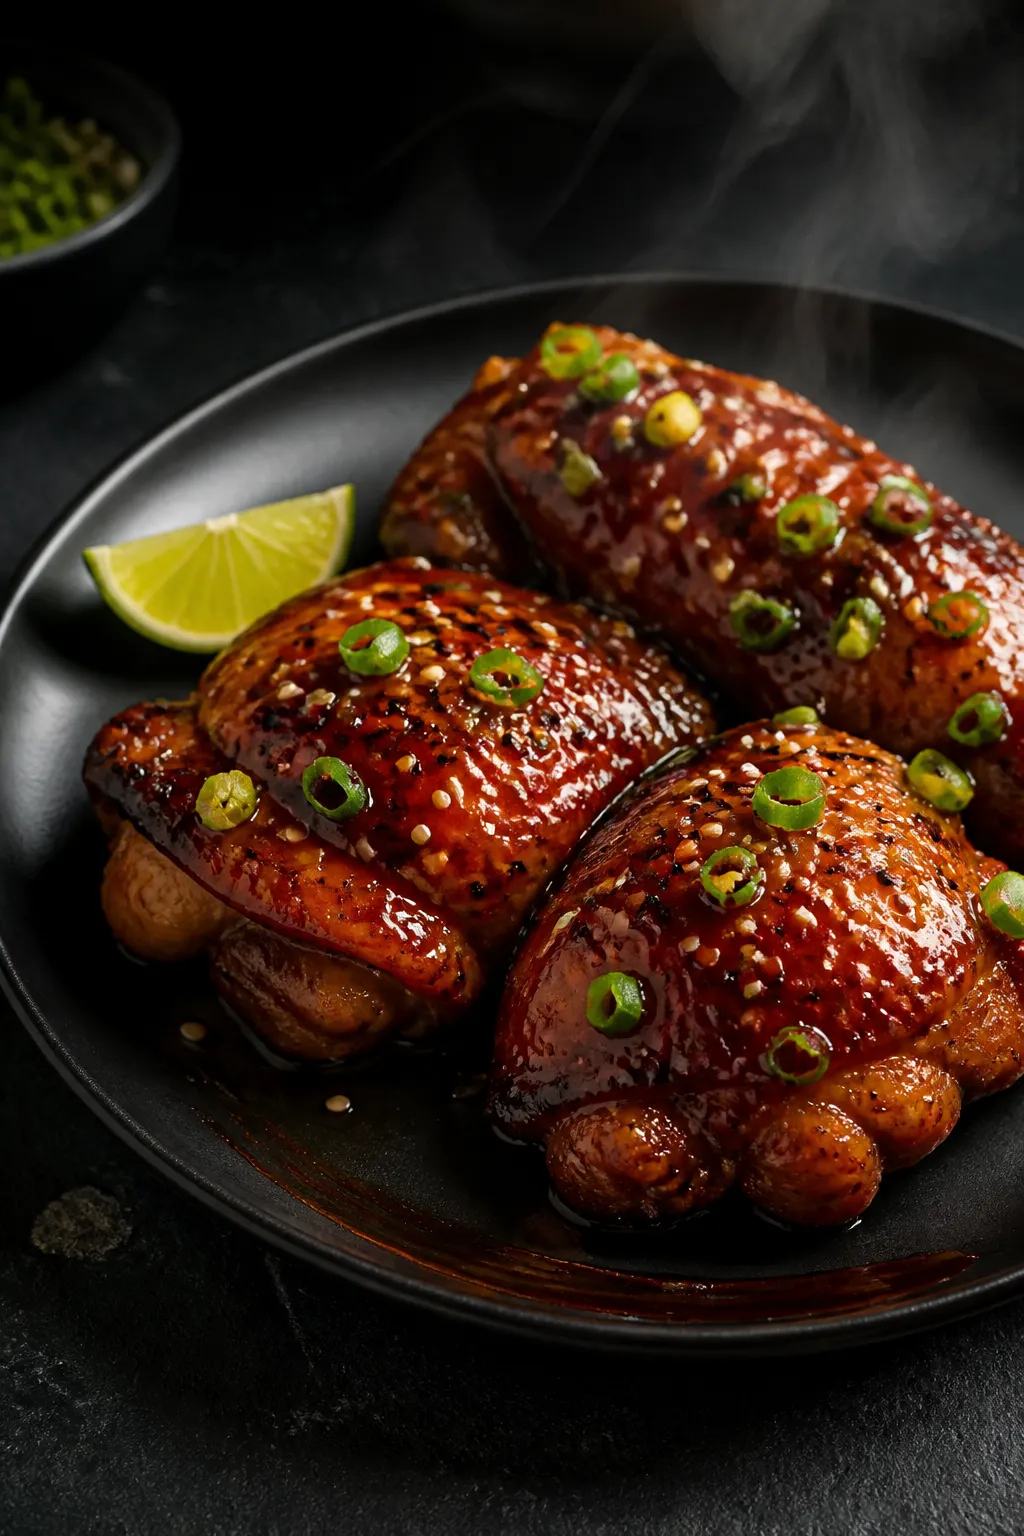
High Protein Honey Garlic Chicken Thighs – Sticky, Savory, and Satisfying
This is one of those weeknight meals that checks every box: big flavor, simple steps, and a solid dose of protein. Juicy chicken thighs get coated in a glossy honey garlic sauce that’s sweet, salty, and just a little tangy. You’ll only need a handful of pantry ingredients, and most of the cooking happens in one pan.
Stop wondering what's for dinner.
Get 7 healthy, family-friendly dinners complete with recipes and simple meal plans delivered straight to your inbox.
Serve it with rice, greens, or noodles, and you’ve got a crowd-pleaser that feels special without the fuss.
Ingredients
Method
- Prep the chicken. Pat the thighs dry with paper towels. Trim any excess fat. Season both sides with salt and pepper.
- Make the sauce. In a small bowl, whisk soy sauce, honey, vinegar, and red pepper flakes. In another small cup, mix cornstarch with water to make a slurry. Keep both nearby.
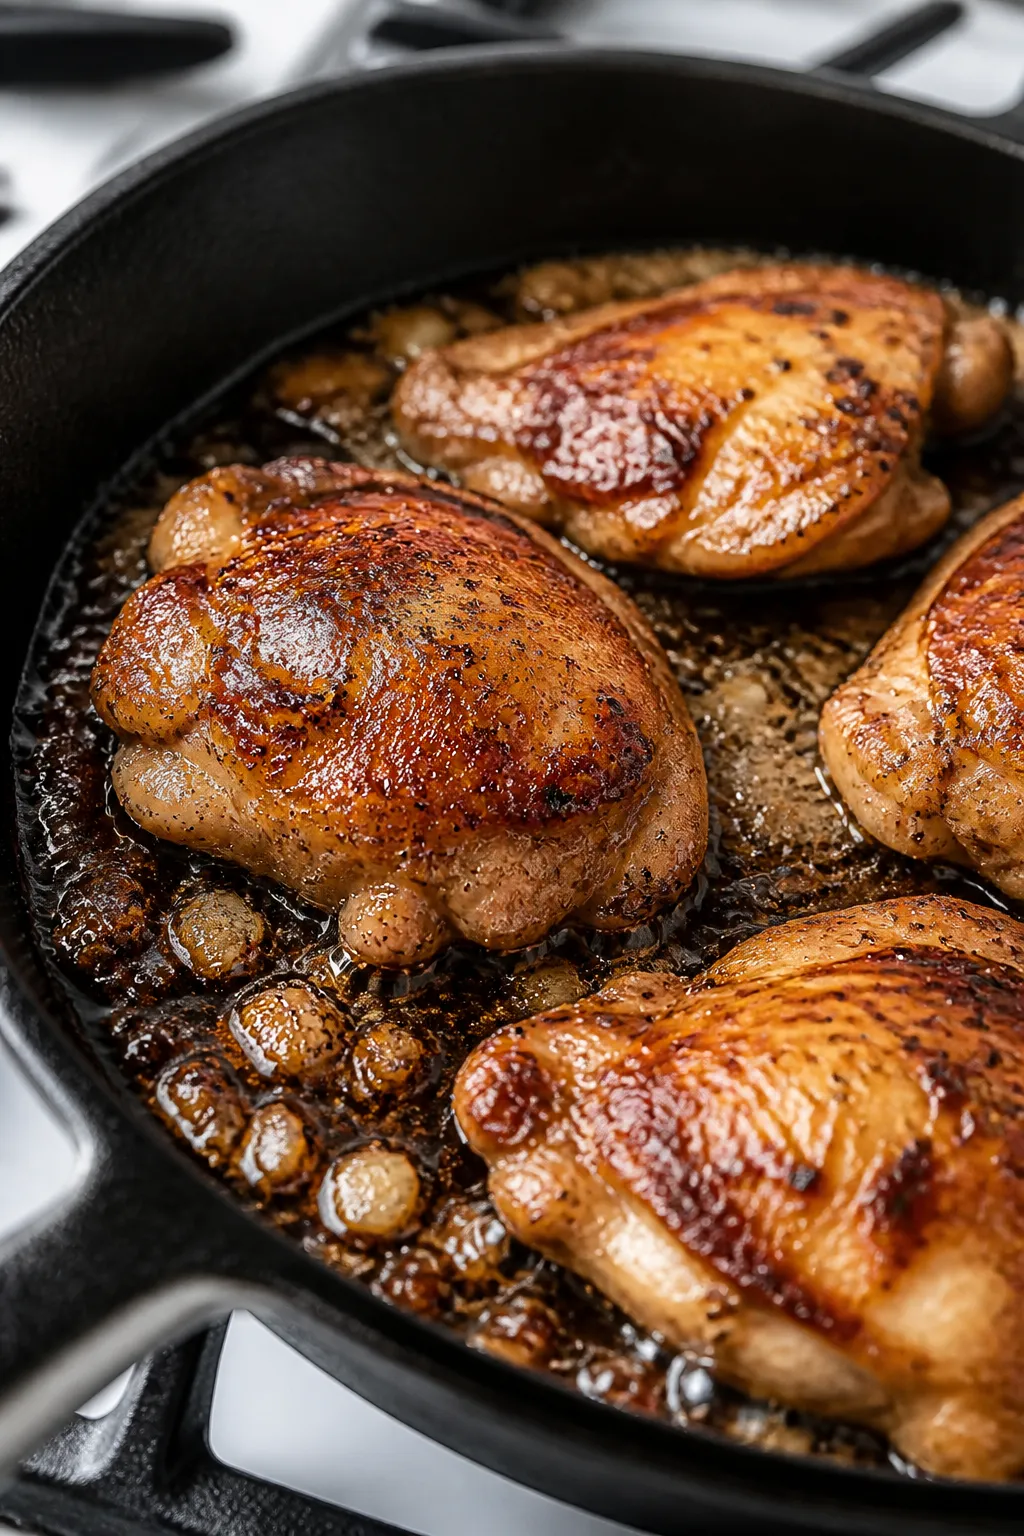
- Sear the thighs. Heat oil in a large skillet over medium-high. Add chicken in a single layer. Cook 4–5 minutes per side until browned and mostly cooked through. Transfer to a plate; keep the pan on the heat.
- Sauté aromatics. Lower heat to medium. Add garlic and ginger to the pan. Stir for 30–45 seconds until fragrant—don’t let it burn.
- Build the glaze. Pour in the soy-honey mixture. Stir and bring to a gentle simmer. Whisk in the cornstarch slurry and simmer 1–2 minutes until the sauce thickens and turns glossy.
- Coat and finish. Return chicken and any juices to the pan. Spoon sauce over the thighs and simmer 2–3 minutes, until the chicken reaches an internal temperature of 165°F (74°C) and is fully coated.
- Add finishing touches. Stir in sesame oil if using. Taste and adjust: more vinegar for tang, more honey for sweetness, a splash of water if the sauce is too thick.
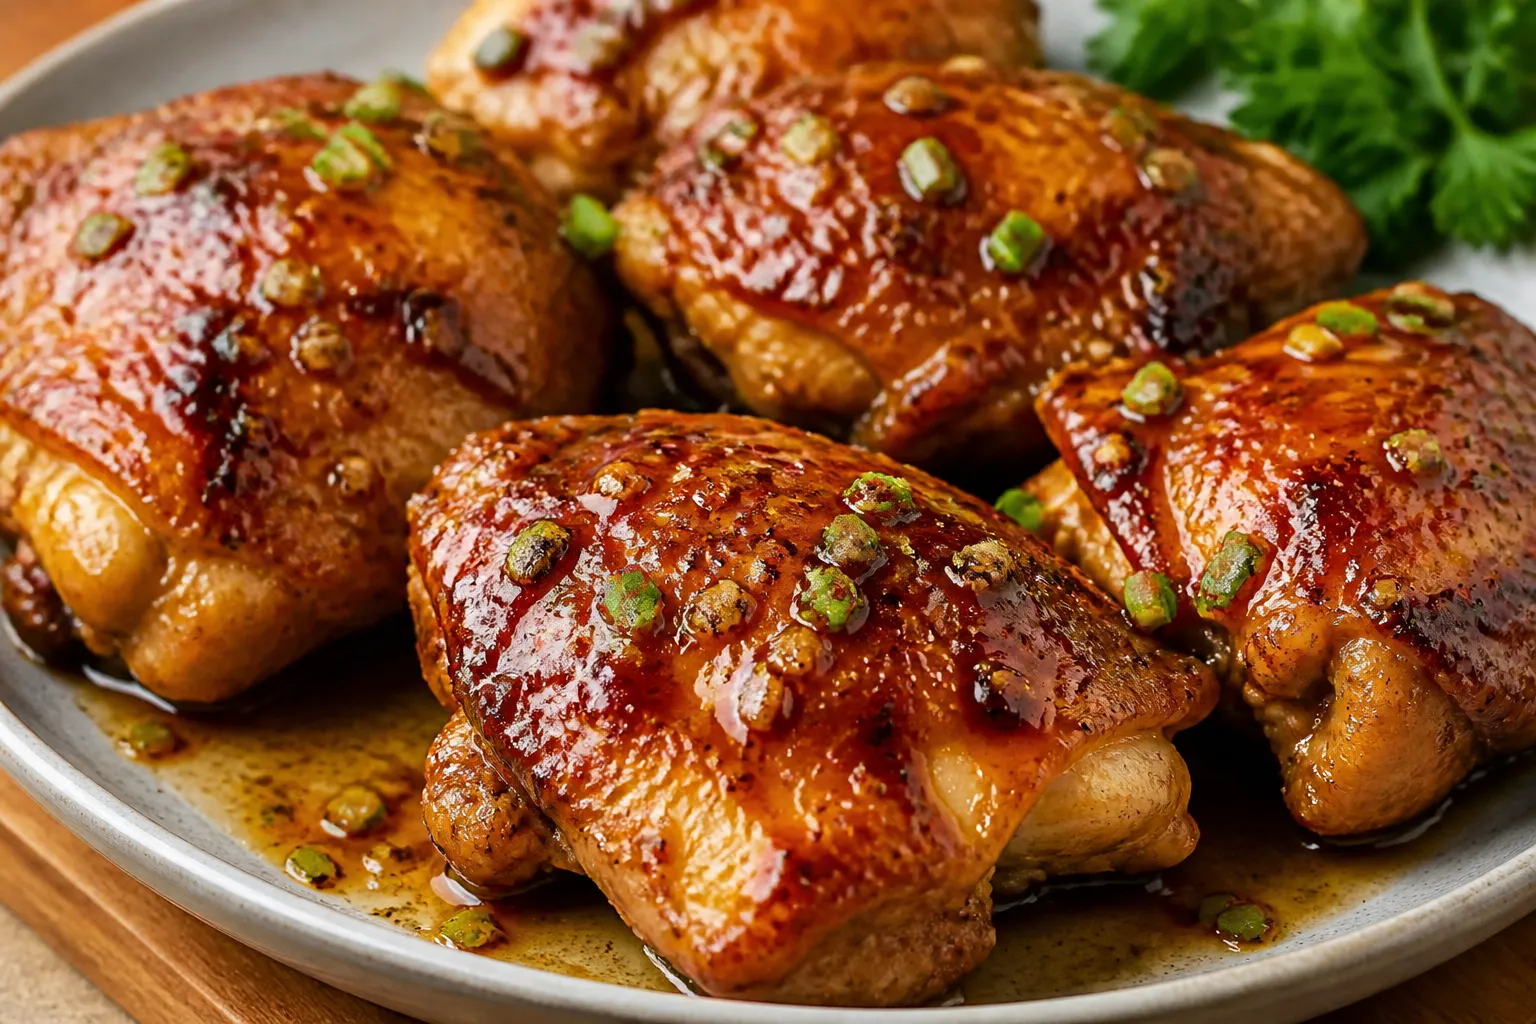
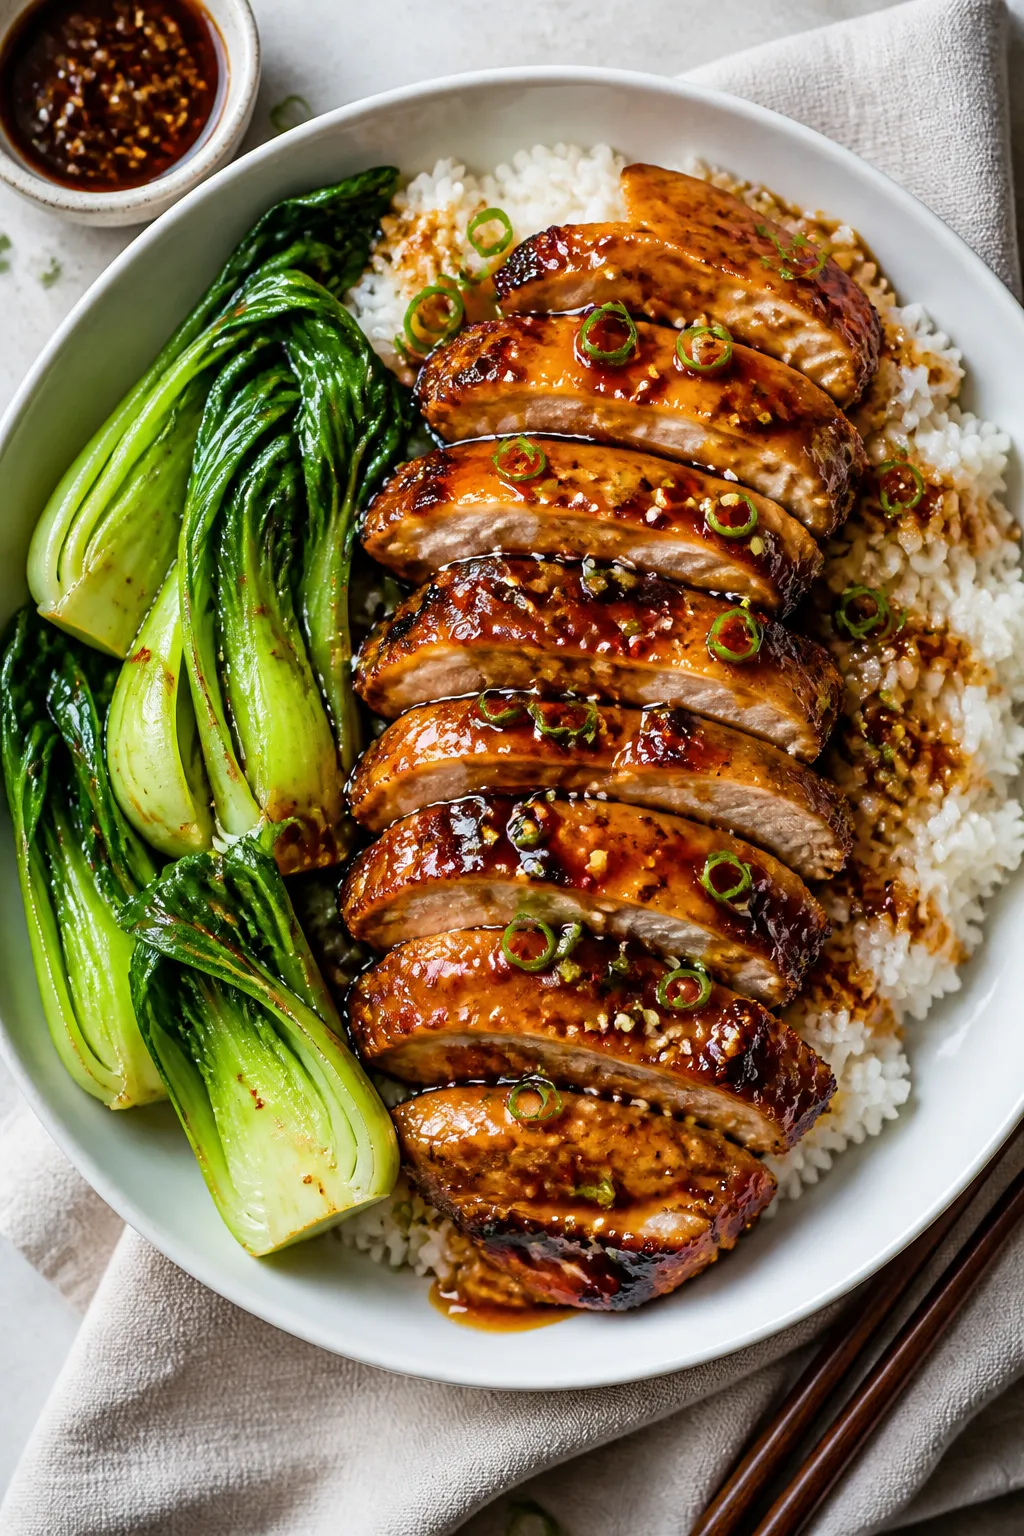
- Serve. Top with green onions and sesame seeds. Pair with rice or your favorite sides and spoon extra sauce over everything.
What Makes This Special
Honey garlic chicken is a classic for a reason, but this version leans into higher protein by using boneless, skinless thighs that stay tender and cook quickly. The sauce is balanced: sweet from honey, savory from soy, and boosted with fresh garlic and ginger. A quick cornstarch slurry thickens everything into a restaurant-style glaze.
Best of all, the recipe scales easily, so you can feed a family or prep lunches for the week.
Shopping List
- Chicken: 2 pounds boneless, skinless chicken thighs
- Salt and pepper: For seasoning
- Olive oil or avocado oil: 2 tablespoons
- Garlic: 5–6 cloves, minced
- Fresh ginger: 1 tablespoon, grated (optional but recommended)
- Low-sodium soy sauce or tamari: 1/3 cup
- Honey: 1/4 cup to 1/3 cup, to taste
- Rice vinegar or apple cider vinegar: 1–2 tablespoons
- Red pepper flakes or chili paste: 1/2 teaspoon (optional for heat)
- Cornstarch: 2 teaspoons
- Water: 2 tablespoons (for the slurry)
- Sesame oil: 1 teaspoon (optional for nuttiness)
- Green onions: 2–3, thinly sliced
- Sesame seeds: For garnish (optional)
- Serving ideas: Steamed rice, cauliflower rice, quinoa, sautéed greens, or roasted broccoli
How to Make It
- Prep the chicken. Pat the thighs dry with paper towels. Trim any excess fat. Season both sides with salt and pepper.
- Make the sauce. In a small bowl, whisk soy sauce, honey, vinegar, and red pepper flakes.
In another small cup, mix cornstarch with water to make a slurry. Keep both nearby.
- Sear the thighs. Heat oil in a large skillet over medium-high. Add chicken in a single layer.
Cook 4–5 minutes per side until browned and mostly cooked through. Transfer to a plate; keep the pan on the heat.
- Sauté aromatics. Lower heat to medium. Add garlic and ginger to the pan.
Stir for 30–45 seconds until fragrant—don’t let it burn.
- Build the glaze. Pour in the soy-honey mixture. Stir and bring to a gentle simmer. Whisk in the cornstarch slurry and simmer 1–2 minutes until the sauce thickens and turns glossy.
- Coat and finish. Return chicken and any juices to the pan.
Spoon sauce over the thighs and simmer 2–3 minutes, until the chicken reaches an internal temperature of 165°F (74°C) and is fully coated.
- Add finishing touches. Stir in sesame oil if using. Taste and adjust: more vinegar for tang, more honey for sweetness, a splash of water if the sauce is too thick.
- Serve. Top with green onions and sesame seeds. Pair with rice or your favorite sides and spoon extra sauce over everything.
Storage Instructions
- Refrigerate: Cool completely, then store in an airtight container for up to 4 days.
- Freeze: Portion into freezer-safe containers with sauce.
Freeze up to 3 months. Thaw overnight in the fridge.
- Reheat: Warm gently on the stovetop over low heat with a splash of water to loosen the sauce, or microwave in 30-second bursts until hot.
- Meal prep tip: Pack with rice and steamed veggies. Keep sauce separate if you prefer your grains less saucy.
Health Benefits
- High-quality protein: Chicken thighs deliver complete protein to support muscle repair, satiety, and balanced blood sugar.
- Iron and zinc: Dark meat contains slightly more iron and zinc than chicken breast, which can support energy levels and immunity.
- Controlled sodium: Using low-sodium soy sauce helps keep salt in check while maintaining flavor.
- Better carbs, better balance: Honey provides quick energy, but pairing it with protein and fiber-rich sides (like broccoli or brown rice) helps slow absorption.
- Garlic and ginger: These aromatics bring anti-inflammatory compounds and add depth without extra calories.
Pitfalls to Watch Out For
- Overcrowding the pan: Cramming in too many thighs leads to steaming, not searing.
Cook in batches for better browning.
- Burning the garlic: Garlic scorches fast. Lower the heat and move quickly when sautéing aromatics.
- Too-salty sauce: Regular soy can be very salty. Use low-sodium, taste as you go, and balance with vinegar or water if needed.
- Sauce too thick or thin: Glaze should coat a spoon.
If it’s too thick, add water; if too thin, simmer longer or add a little more slurry.
- Uneven doneness: Thighs vary in size. Check the thickest piece with a thermometer to ensure safe, juicy results.
Recipe Variations
- Air fryer version: Season thighs and air fry at 385°F (196°C) for 14–18 minutes, flipping halfway. Simmer sauce on the stovetop, then toss cooked thighs in the glaze.
- Oven-baked: Bake seasoned thighs at 425°F (218°C) for 18–22 minutes.
Meanwhile, make the sauce on the stove. Brush or toss baked thighs in the thickened glaze and broil 1–2 minutes to set.
- Extra protein boost: Add toasted edamame or sliced almonds to bowls, or serve with quinoa instead of rice.
- Lower sugar: Cut honey to 2 tablespoons and add 1–2 tablespoons orange juice for brightness. Expect a less sticky but still flavorful sauce.
- Gluten-free: Use tamari or coconut aminos and confirm your cornstarch is gluten-free.
- Spicy: Add sriracha, gochujang, or more red pepper flakes for heat.
- Citrus twist: Stir in fresh lemon or lime zest at the end for a fresh pop.
FAQ
Save time, eat healthier, and take the stress out of dinner.
Get a full week of easy healthy dinners delivered straight to your inbox.
Can I use chicken breast instead of thighs?
Yes.
Slice breasts into cutlets so they cook quickly and stay tender. Sear 3–4 minutes per side and finish in the sauce. Keep a close eye on temperature—breast dries out faster than thighs.
How do I keep the sauce from crystallizing or getting grainy?
Honey dissolves best over gentle heat.
Stir well, avoid high heat once the honey is in the pan, and don’t reduce the sauce to the point of scorching. A splash of water helps maintain a smooth texture.
What sides go best with this?
Steamed jasmine rice, brown rice, quinoa, or cauliflower rice all work. For vegetables, try roasted broccoli, blistered green beans, sautéed bok choy, or a crisp cucumber salad to cut through the sweetness.
Can I marinate the chicken first?
Absolutely.
Mix 2 tablespoons soy sauce, 1 tablespoon honey, 1 teaspoon grated ginger, and 2 minced garlic cloves. Marinate 30 minutes to 2 hours, then cook as directed. Reduce the sauce ingredients slightly to account for the marinade.
How much protein is in a serving?
Roughly 35–40 grams of protein per serving if dividing the recipe into four portions, depending on the size of the thighs.
Exact numbers vary by brand and portion size.
Do I need sesame oil?
No. It’s optional but adds a toasty finish. If you skip it, the dish still tastes great thanks to the garlic, ginger, and soy-honey balance.
Can I make it ahead?
Yes.
The chicken reheats well, and the sauce actually deepens in flavor by the next day. Reheat gently and add a splash of water to keep the glaze silky.
Wrapping Up
High Protein Honey Garlic Chicken Thighs bring together everyday ingredients for a meal that’s sticky, savory, and incredibly satisfying. The steps are simple, the sauce is foolproof, and the results win over picky eaters and food lovers alike.
Make a big batch, stash some for tomorrow, and enjoy a go-to recipe that earns a permanent spot in your weeknight rotation.
Printable Recipe Card
Want just the essential recipe details without scrolling through the article? Get our printable recipe card with just the ingredients and instructions.
Loved This Recipe?
If you're looking for more simple, healthy dinners your family will actually eat, grab my FREE 7-Day Easy Dinner Reset. You'll get 7 easy dinner recipes, simple grocery lists, and a done-for-you plan that takes the stress out of mealtime.